AO4 - Final Piece Plan
Now that you have fully developed your idea for a final piece, you should finalise your ideas by creating a plan for what you will create.
This will help you remain focused while creating your final outcome and ensure that your work remains linked to the themes of your project - the more prepared you are to begin creating your work, the fewer surprises you'll have while creating it.
It's also a chance to double check that your outcome is going to look the way you intend it to and to know what problems you might face (and how you might solve them) when creating your final piece.
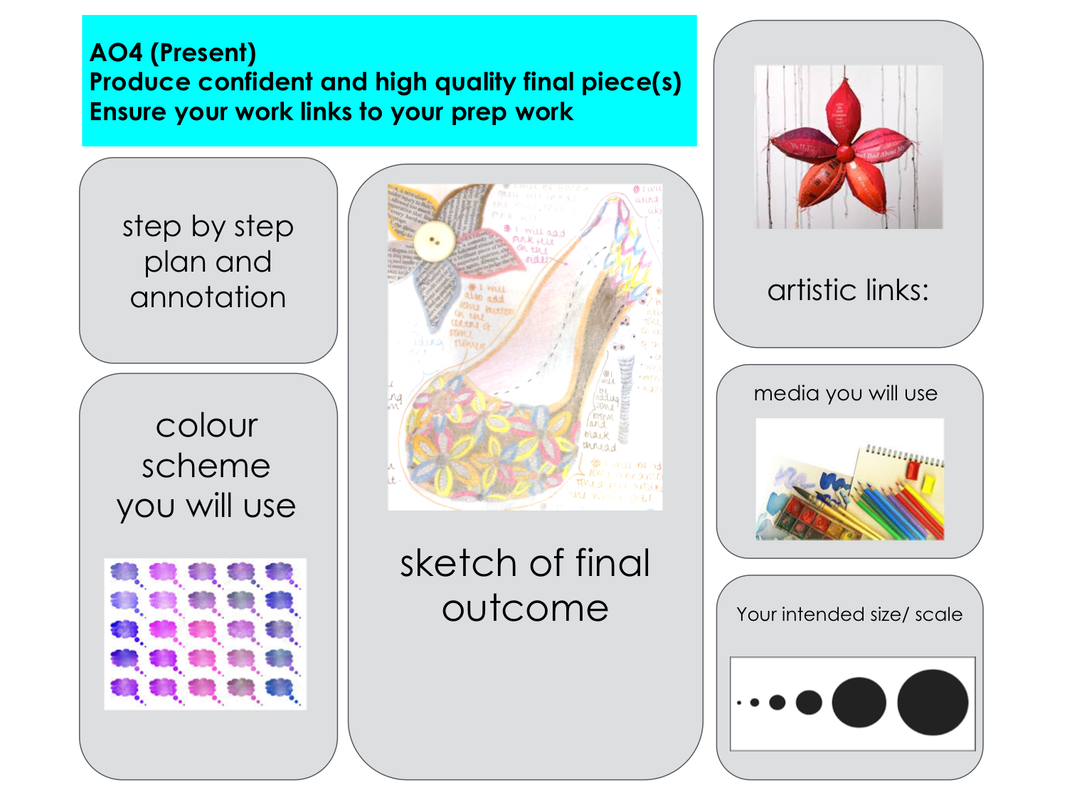
-Your final piece plan could include:
- A rough sketch of how your final piece will look (this is a great chance to double check your composition/layout)
- Swatches demonstrating the colour scheme you intend to use
- Final experiments with the techniques you might use
- Notes on the media you have chosen
- Explanation of how your idea links to the artists you researched
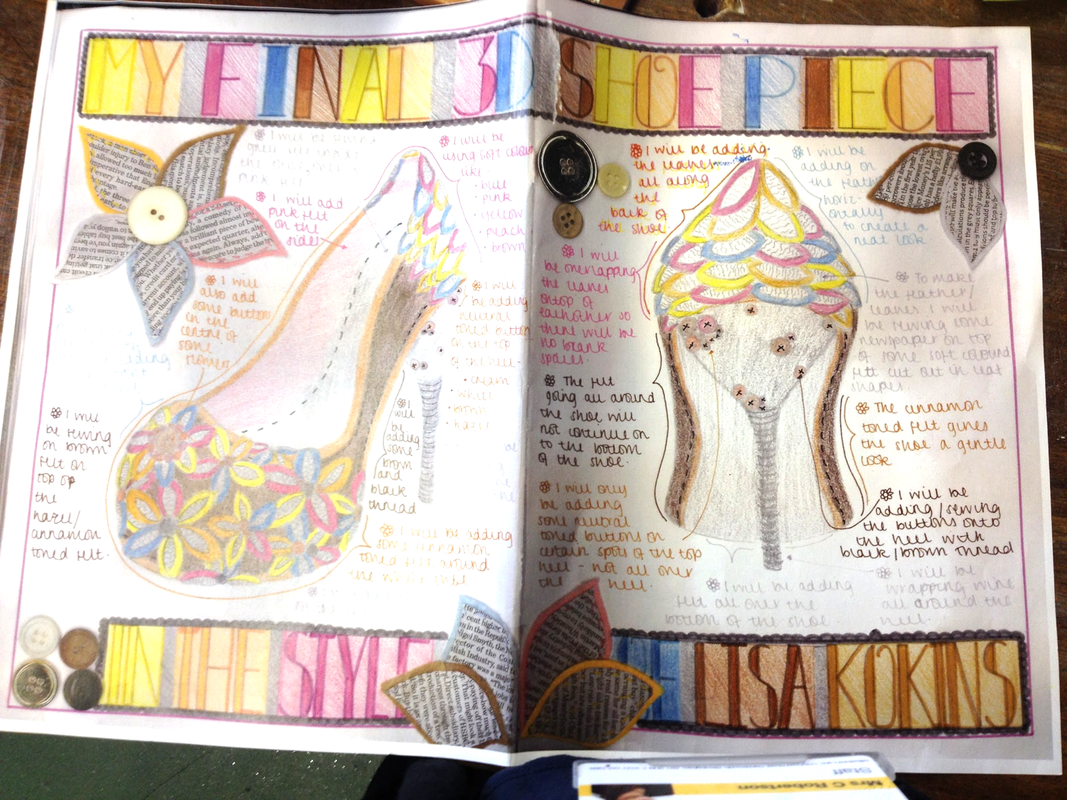
Take a look at the final piece plan template on the left and how this could inspire a finished final piece plan on the right:
This will help you remain focused while creating your final outcome and ensure that your work remains linked to the themes of your project - the more prepared you are to begin creating your work, the fewer surprises you'll have while creating it.
It's also a chance to double check that your outcome is going to look the way you intend it to and to know what problems you might face (and how you might solve them) when creating your final piece.
-Your final piece plan could include:
- A rough sketch of how your final piece will look (this is a great chance to double check your composition/layout)
- Swatches demonstrating the colour scheme you intend to use
- Final experiments with the techniques you might use
- Notes on the media you have chosen
- Explanation of how your idea links to the artists you researched
Take a look at the final piece plan template on the left and how this could inspire a finished final piece plan on the right:
|
|
More examples and help sheets on Final Piece Plans can be found below:
Generally speaking, you will be graded as follows:
Green (grade 1/2) - Your final piece plan includes a rough pencil sketch of your work. There is not a clear link between your developments and your final piece plan, you have changed your idea a lot.
Amber (grade 3) - Your final piece plan is rough, but includes details of the colours, media and techniques you will use moving forward. There is some visual link between your developments and your final piece plan.
Red (grades 4+) - Your final piece plan is detailed and you are clearly prepared to create your final piece. You know the equipment you will need and have prepared for any problems you might face during the creation of your outcome. You have made clear links between your developments and your final idea.
