AO1 - Artist Research
Artist Mood Boards
As we begin to generate our own ideas, it is important to acknowledge the work of existing artists who may work in a style which could influence us and therefore strengthen our own work.
To do this, we should spend some time researching artists who we would like to be inspired by in our projects.
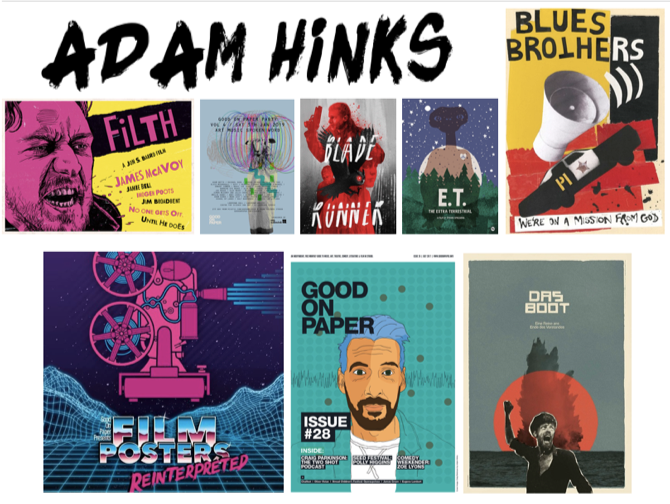
A great way to start off your research is to create a mood board full of work by the artist you have chosen to research.
This will help you get a feel for the kind of work they tend to create and the common themes within their work.
You should aim to include at least 8 images of their work on one page, and the layout should be of a similar standard to your other mood boards.
To do this, we should spend some time researching artists who we would like to be inspired by in our projects.
A great way to start off your research is to create a mood board full of work by the artist you have chosen to research.
This will help you get a feel for the kind of work they tend to create and the common themes within their work.
You should aim to include at least 8 images of their work on one page, and the layout should be of a similar standard to your other mood boards.
Generally speaking, you will be graded as follows:
Green (grade 1/2) - You have picked an artist to research and included 8 images of their work on the page. Your page has an appropriate title (the artist's name).
Amber (grade 3) - You have picked an artist to research and included 8+ images of their work on the page. Your page has an appropriate title (the artist's name) and the typography on the page has been carefully chosen and placed. Images have been resized thoughtfully on the page and have been carefully chosen to reflect the theme of the project as well as the artist's work in general.
Red (grades 4+) - You have picked an artist to research and included 8+ images of their work on the page. Your page has an appropriate title (the artist's name) and the typography on the page has been carefully chosen and placed. Images have been resized thoughtfully on the page and have been carefully chosen to reflect the theme of the project as well as the artist's work in general. You have made a creative page layout with even margins between your images and text. You have included short annotations/explanations of the artwork you have chosen using technical language.
Artist Research Pages
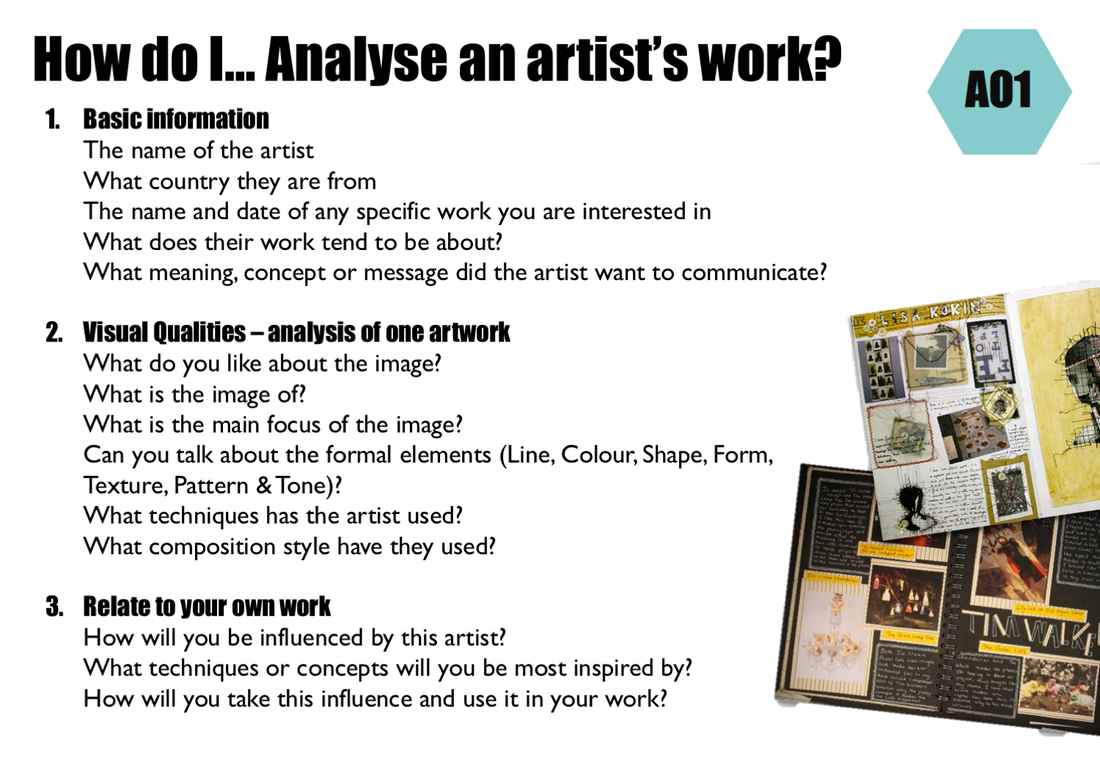
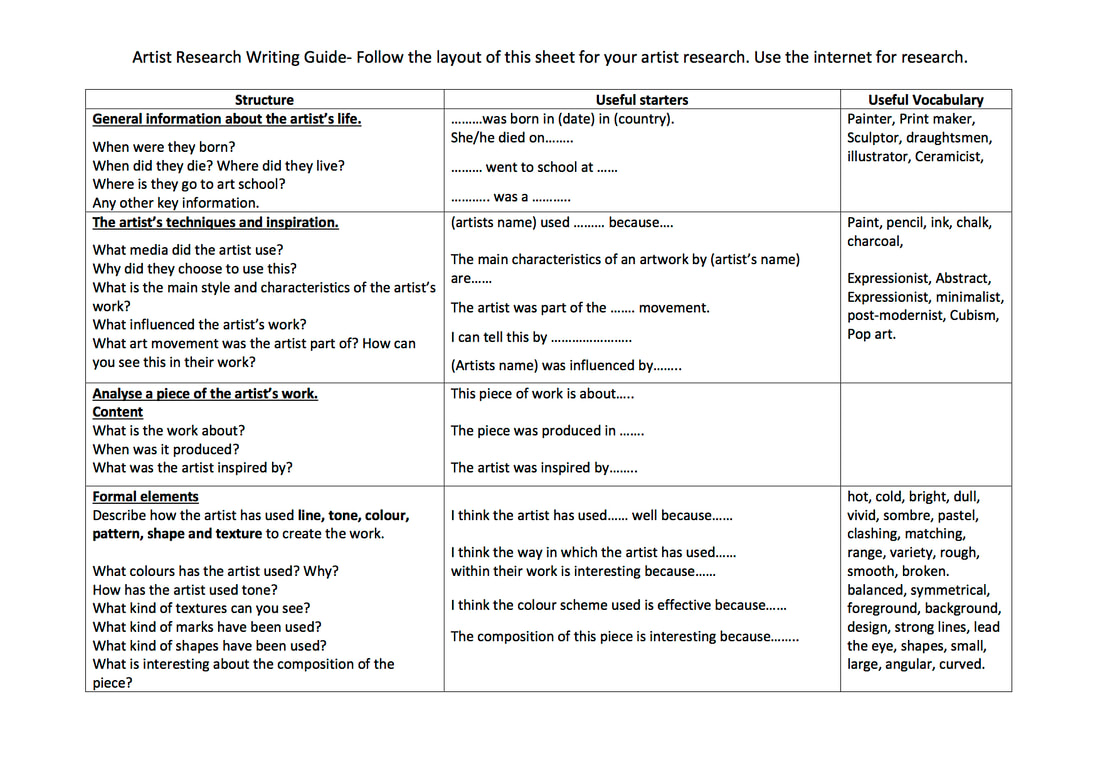
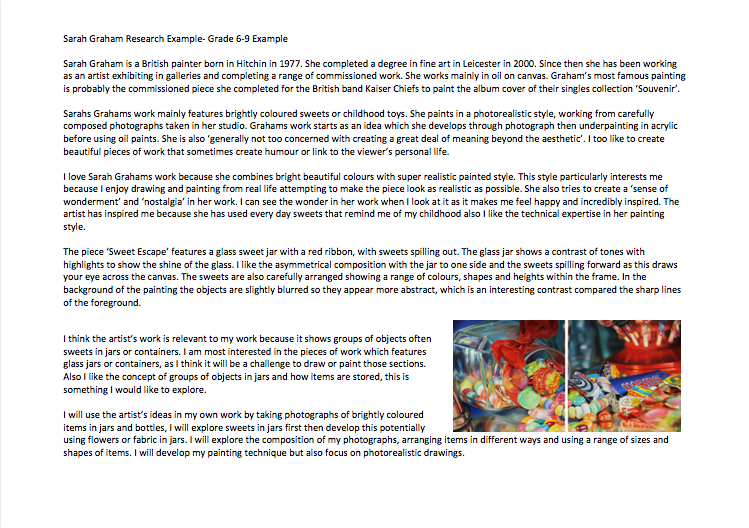
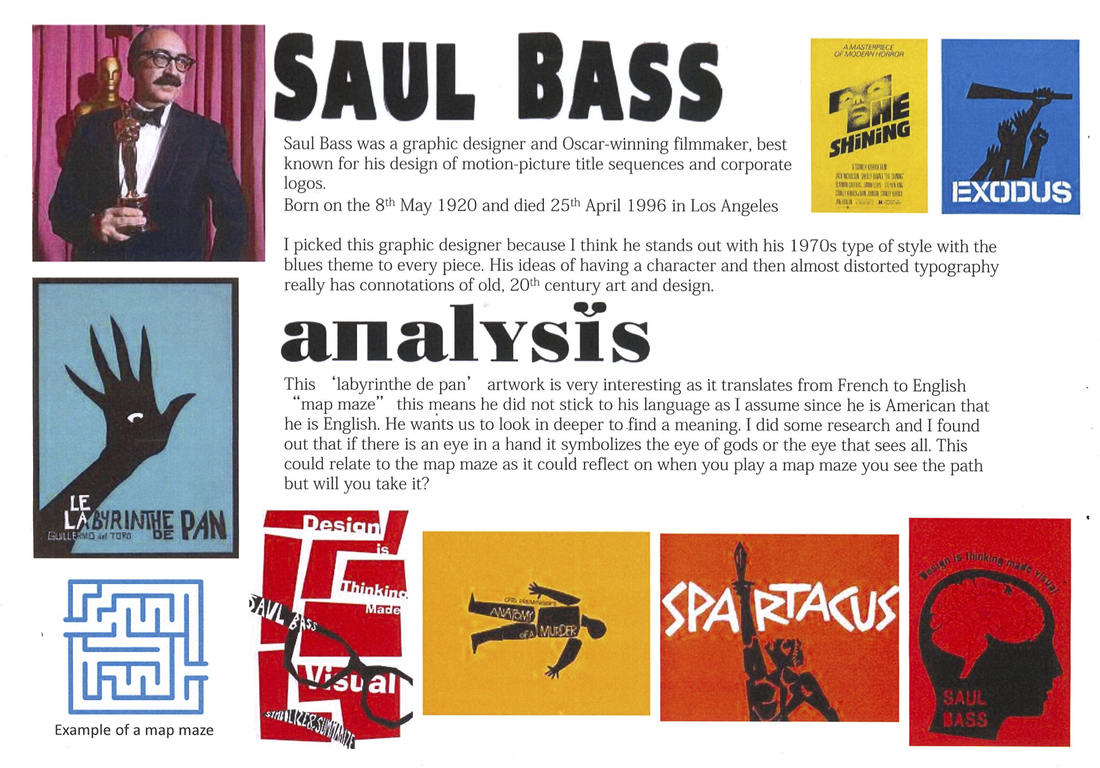
Now that we have looked broadly at the work of an artist, it is important for us to focus in and learn more about them, we do this by creating an Artist Research Page.
It is important to look closely at the work in our research (not just including a biography of their life) because it is the work that we wish to be influenced by and therefore that should be main the focus of your page.
It is important to look closely at the work in our research (not just including a biography of their life) because it is the work that we wish to be influenced by and therefore that should be main the focus of your page.
Remember to include images on your page as well as writing, you should aim for at least 4 images with the one you are analysing being the largest.
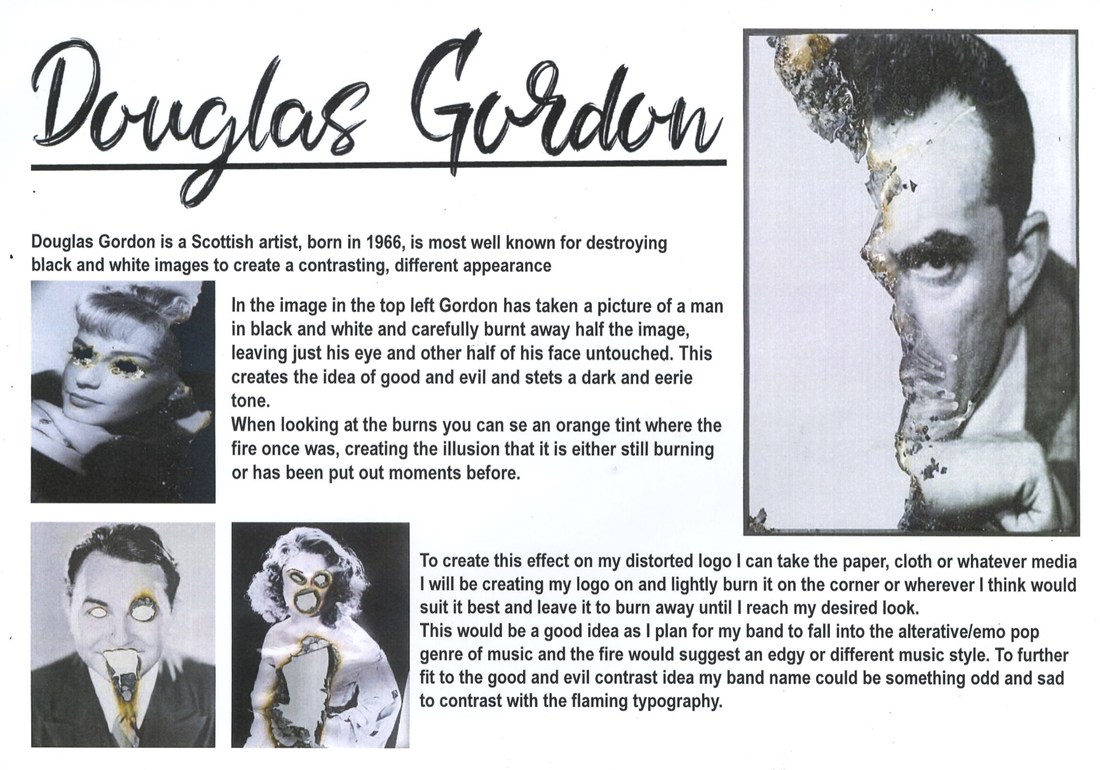
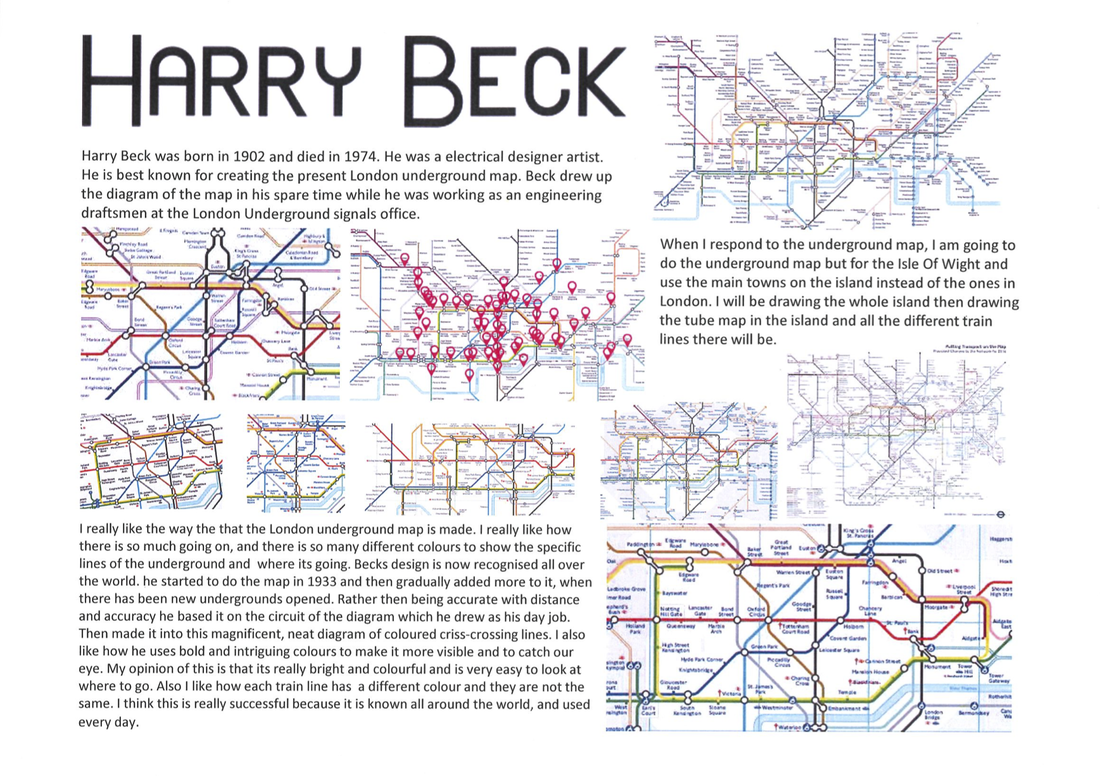
Take a look at these examples for further inspiration:
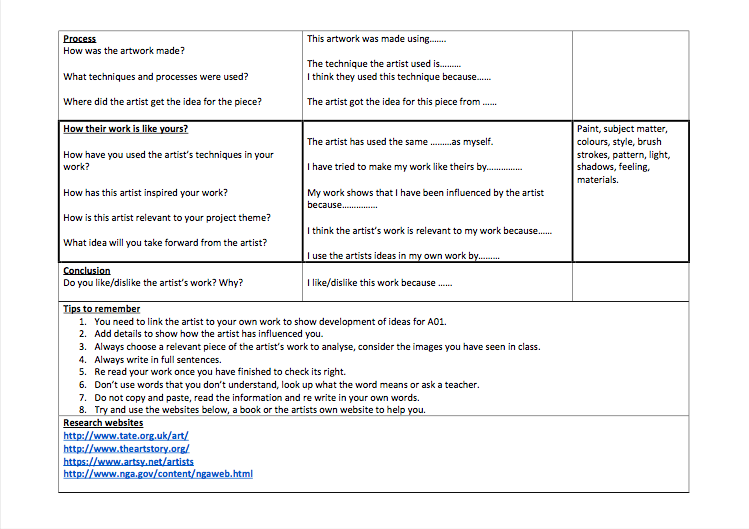
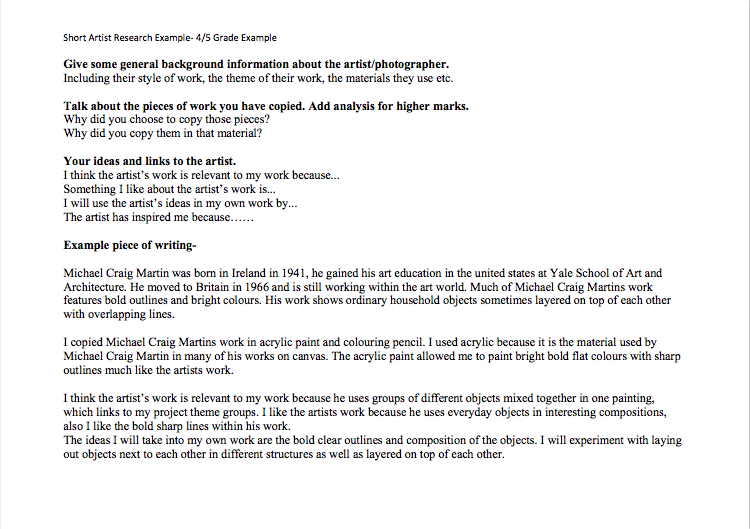
These writing guides can give you a more in depth idea about what to include in your analysis along with suggestions of specific vocabulary you can use.
Click on them to expand the image and see them in more detail:
Click on them to expand the image and see them in more detail:
|
|
Generally speaking, you will be graded as follows:
Green (grade 1/2) - You have created a research page with a section of images by your chosen artist and a short biography consisting of information you found about their life on the internet.
Amber (grade 3) - You have created a research page with a section of images by your chosen artist and a short biography consisting of information you found about their life on the internet. You have picked one piece of their work to analyse in detail, but it may not be relevant to the themes of your project.
Red (grades 4+) - You have created a research page with a section of images by your chosen artist and a short biography which is written in your own words. You have included an analysis of one piece of the artist's work and used technical language to describe the media/processes they use. You have commented on the meaning behind their work and how this fits with the theme of your project. You have commented on how you plan to respond to the artist's work.
Artist Responses
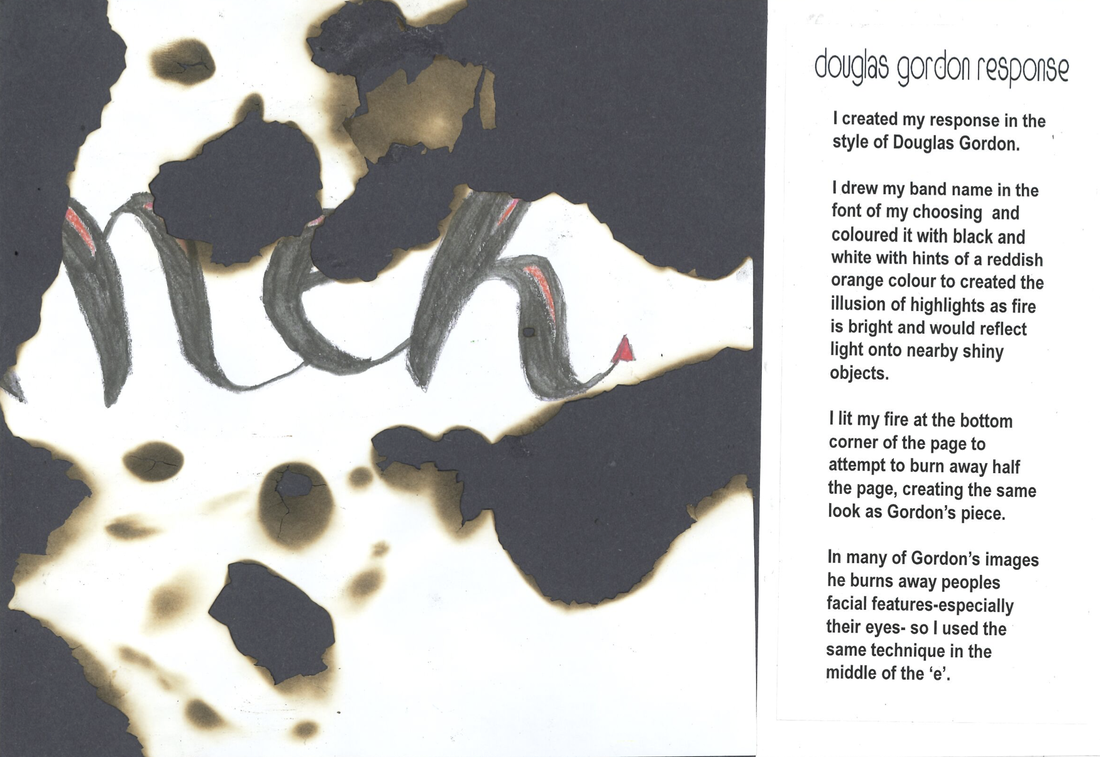
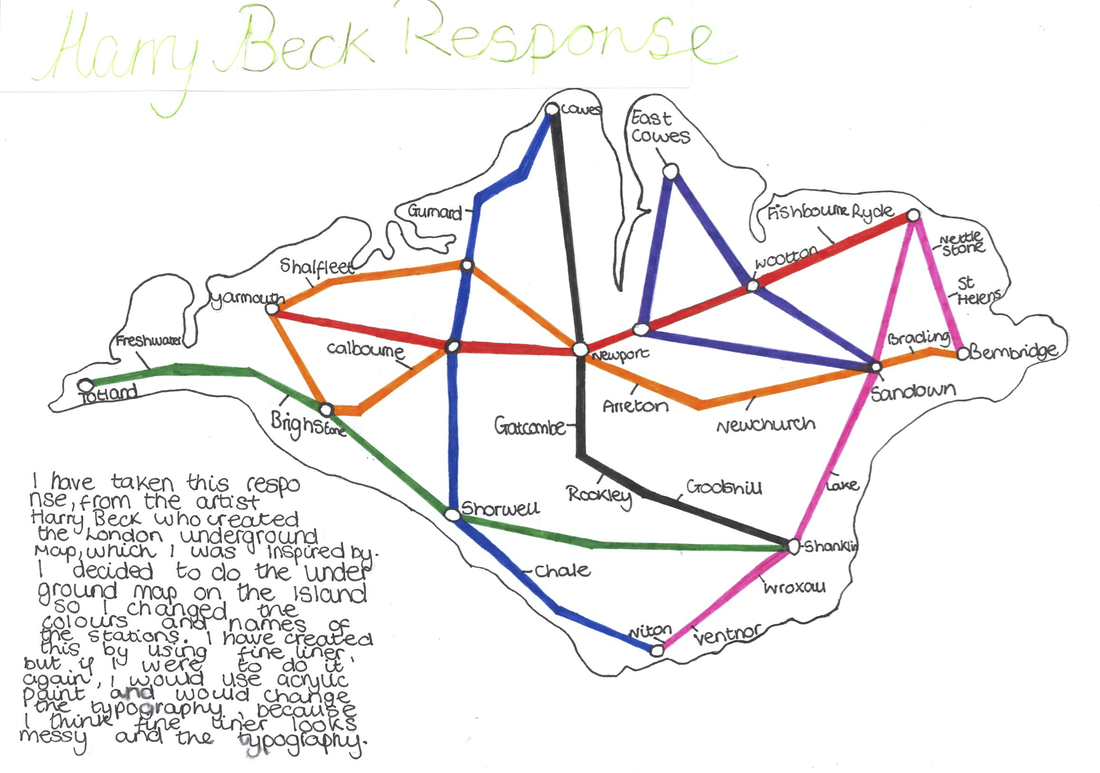
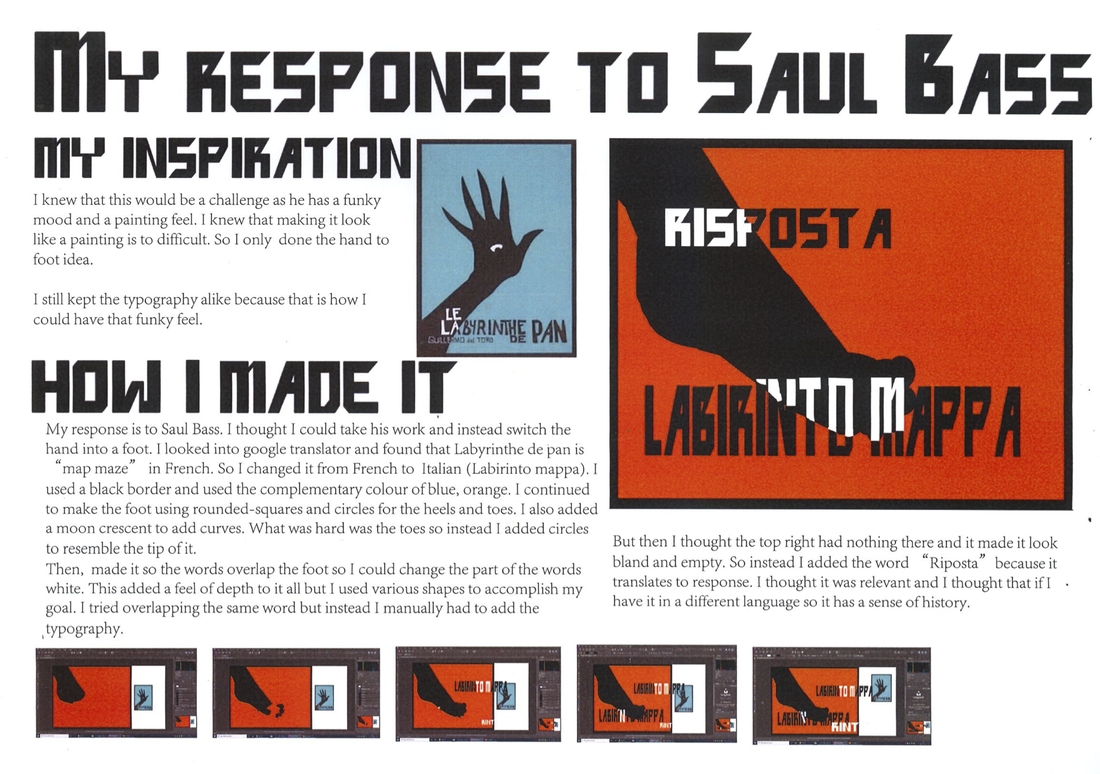
As part of your research, you should take a look at the work of the artists you have chosen to be influenced by and create your own visual responses to their work. This process allows you to better understand the techniques they use and how their work is made which is knowledge that you can take forward with you into the rest of your project.
You should aim to create one A4 response to each artist.
Remember, a response is not simply a copy of the work; it should be your own image, but completed in a similar style to your chosen artist.
If you can, you should try to use one of your own photographs (or one of your drawings) as the basis for the image you will create.
Working from ‘primary sources’ (photos/images you have created yourself) helps you to create a more personal response, which is one of the things the examiner is looking to see in your work.
If none of your images are suitable or your idea for a response is not linked to the photographs you have taken so far you could take some more photographs to use in your response (extra marks!) or you can work from images which you find online.
Take a look at these responses alongside the research pages which go with them to get an idea of how your responses could relate to the artists you've studied:
|
|
Generally speaking, you will be graded as follows:
Green (grade 1/2) - You have created a response to the work of your artist using secondary sources (images you found on the internet) as the basis for your images. There is no clear link to the work of your artist. You have not used the same media, processes or techniques as them and therefore your work does not look similar to theirs.
Amber (grade 3) - You have created a response to the work of your artist using primary sources (your own photos/drawings) as the basis for your images. There are some links between your work and that of your artist, but these links are inconsistent (you might have used the same media but not the same technique, for instance).
Red (grades 4+) - The response you have created is completely in keeping with the style of the artist you have researched. You have worked from primary sources (your own photos/drawings) and used the same medias in a similar way to the original work. You have also used similar colour schemes and the composition of your work mimics the artist's style.
